25-step music production process checklist and video workshop >>>
Revealed: Basic Home Studio Recording Skills for Electronic Music Producers and Beat-Makers
In This Post You'll Discover 11 Tips and Tricks to Improve Your Home Studio Music Recording Skills and Also Uncover The 5 Factors You Can Adjust for Better Vocal Recordings in Your Home Studio + More!

Why We Need Basic Home Studio Recording Skills
Fact: Producers and beat-makers need basic home studio recording skills.
Yes, true, electronic music producers and beat-makers tend to spend most of their time doing everything but tracking live instruments or vocals.
While the above is a fact there are times where some basic music recording skills come in handy. The obvious examples will be when you need to lay down some vocals on a budget or decide to record some instrument, usually guitar.
Now, you probably don't have to delve into advanced stereo microphone techniques or track a full drum kit just yet, but the ability to track good vocals and maybe a few instruments like guitars is a good place to start.
In this post we survey the landscape of basic home studio recording for producers and beat-makers. You'll discover what you need to lay down quality tracks in a challenging home studio environment and get a comprehensive basic understanding of what it takes to make sure you get the sound you want when you record.
"How Do I Start Recording Music at Home?"
The proliferation of decent and affordable home studio recording equipment means it's easier than ever to get good results with home studio recording.
Here's a list of the 8 basic pieces of studio gear you'll need for recording music at home:
- A Microphone
- Headphones
- Audio Interface
- Computer
- Recording Software
- A Mic Stand
- Microphone/Instrument Cables
- A Pop-Filter (for Vocals)
Now, of course you may add other things to the list if needed but the above 8 things are the essentials you cannot get away without.
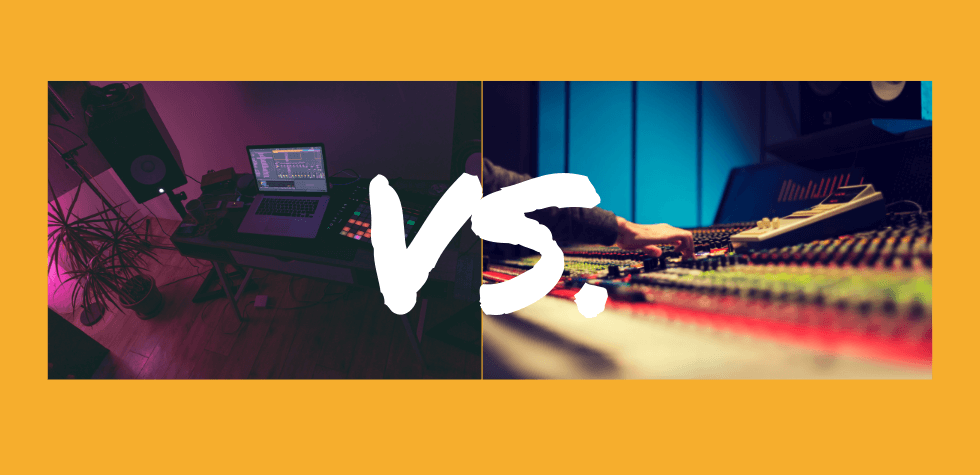
Home Recording vs. Professional Studio Recording:

Home studio recording introduces challenges you don't usually have in a professionally designed and built-out studio. It helps to understand the limits of the home studio environment so you can find ways to still get a good sound.
The main advantages of a well-designed professional recording studio are:
- Better Acoustics - Higher quality soundproofing, acoustic treatment and room design.
- Better Equipment - Both the quality and range of equipment available.
- Access to Pro Engineers - Their knowledge and experience makes life easier if you have the budget.
There will be times when your projects demand a pro studio or the budget justifies it. This post is however about getting a good sound at home, so let's get right back to it!
"How Do You Make a Good Recording at Home?" - Here's 11 Tips to Make Sure You Make Your Life Easier When Recording in Your Home Studio

1. Overcome Home Studio Recording Challenges
Most homes aren't built with home studio recording as a main priority. So, as mentioned above, you'll run into challenges with room acoustics that need to be overcome to get professional-level results when tracking.
The 2 main home studio recording challenges you'll often face are:
- Noise
- Reflections
You don't realize just how much noise you have around you until you put up a mic and listen to what it captures. Is that a dog barking three blocks away? Probably!
The way you get around this is by creating as much insulation as possible. Real insulation is however expensive so in most cases it won't be an option for most of us. The other way to make sure you get as little outside unwanted noise on your recordings is to record when there is as little noise as possible. This may mean recording later at night when everyone's asleep. Your neighbors are going to love you! ;-)
Reflections in the room you track in can cause a host of issues. The main issue is that these reflections show up in your recordings and make your recordings sound worse, unless of course you're lucky enough to have a good-sounding room.
Reflections are at least a bit more manageable than noise. In most cases you'll want to get it as dead as possible for vocals and maybe a little bit more lively for guitar.
Here are some things you can do to tame reflections when you record at home:
- Add Absorption - This can be acoustic panels, gobos, blankets or mattresses.
- Use a Reflection Shield - The idea is to filter out reflections around the mic.
In most cases absorption is your best option. A reflection shield can also work but you'll have to be careful that the close proximity of the shield doesn't add ringing to your recording. Listen carefully before you hit record.
2. Pay Attention to Mic Positioning
Where you place your microphone in relation to your sound source makes a massive difference to the quality of the sound you'll capture.
Here are a few ways to ensure you get a good sound down on tape:
A. Start with the End in Mind
Ask yourself what sound you're going for. Then look at your room and decide where you need to place your source and microphone in your room to be most likely to get the sound you want.
B. Pay Attention to Your Source and Room Sound
Different vocalists will sound better with different mic positions. So, if you're recording a wispy indie girl who barely whispers when she sings, you want to get in closer than you would with a true-blue belter, for example.
The same goes for players. The level guitarists will play at will be different from song to song and you want to take this into account when you place your microphone.
It's also important to understand the basic nature of the instrument you're recording. The position you place your mic in and the direction you point your mic in will make a huge difference in the tone of the recording.
Pointing your mic straight at the sound-hole on your guitar will produce a different sound than pointing it at the bridge or slightly off-axis away from the guitar. The same goes for a vocalist. Pointing your mic more towards the vocalist's nose will have a different sound to pointing it more towards the vocalist's chest.
Here are 3 tips to help you get your mic placement right:
- Listen - You cannot just whack up a mic and expect it'll be good. Put your head in the possible positions for your mic and listen to the instrument and room blend in these positions. Place the mic where it sounds closest to the tone you're aiming for.
- Experiment - Try different positions and compare them before deciding where to place your mic.
- Test - Record a bit of the performance and listen back in your mixing position. Adjust if needed and record another test run.
The main thing is to not accept good enough when you place your mics. Put in a bit of work now and you'll be glad you did, come time for mixing. So, make sure you're happy with your sound before you record your first take.
3. Choose the Best Microphone
You may not have a well-stocked mic locker when you start out in which case you'll have to make do with what you have. If you however have different mics then test them and choose the one that sounds best.
Also remember that you don't always have to use certain mics for certain functions. Some vocalists may sound better with ribbon or dynamic mics than with condenser mics, for example. Again, this is where you want to test and make sure you choose the mic that works best on the source and for the song or track.
4. Get Your Levels Right Going In
You need to make sure your levels are optimal at every stage of the recording chain going into your DAW and make sure you get good levels on the recording itself.
The optimal level depends on the gear you use so do some research and find out what's an optimal level for each pre-amp and effect you use on the way in.
The main thing with digital recording is not to go too hot but rather err on the side of more headroom. Clipping is a no-no in the digital realm because it causes distortion, not the good kind. At the same time, with high-resolution digital recording, 24-bit and up, you also don't have to worry too much about the noise-floor like you may have had to do back in the days of tape.
So, in short, pay attention to gain staging and get your levels somewhere in the middle with nothing peaking too close to digital zero.
TL;DR: "So, at what level should I record at?"
Keep your average levels at around -18DBFS, with your highest peak levels not much higher than -10DBFS to -6DFBS to stay on the safe side. This will give you enough headroom and avoid any issues with clipping. You want to make sure the level is healthy, so not too low on average, but there's no advantage in driving the signal too hard in the digital realm.
5. Spend Some Time to Get a Good Headphone Mix
Make sure you or the artist you're recording is happy with the headphone mix. If the vocalist, for example, cannot hear the track or guide track well, the performance will suffer. They may want some more kick or snare to hit their cues well. They may want certain instruments completely removed if it interferes with or makes their part difficult to execute.
So, spend some time making sure you or the performer vibes with the headphone mix and you're more likely to get the takes you need.
6. Watch Out for Headphone Bleed
This one's simple. Make your headphone mix too loud and some of it might end up in your recording.
So, obviously use closed-back headphones and listen carefully when you test to make sure none of the headphone mix is present when you record. Especially if you or your artist are of the one-ear-on-one-ear-off variety!
7. Don't Be Afraid to Add Processing on the Way In
You may have heard that you want to record dry, without any effects or processing on the way in. This is fine but it means you'll have to work harder in the mix stage of the music production process.
So, don't hesitate to use some EQ and compression when you do home studio recording. The trick is obviously just not to overdo it so you end up stuck with too much processing. This is why it's quite important to know ahead of time what kind of sound you're aiming for.
It's still a safe choice to avoid reverb and delay in your signal chain unless of course it's definitely part of the sound of the vocal or instrument part for the song or track. A bit of compression and EQ is something that can make your life way easier when you mix though. Just make sure you're completely happy with it when you track.
8. Remember the Pop-Filter for Vocals
This one may be obvious to you but we'll include it for the sake of covering all bases.
Explosives can cause your mic to pop and popping is a pain in the rear-end to remove when you mix. So, use a pop filter when you're recording vocals. Always.
9. Do as Many Takes as Humanly Feasible
Aim for at least 5 takes. Do more if you can. The more the better.
Now of course you can only push a vocalist or player so far and more takes means more space. You'll also have to go through all of those takes during the mix process or when you're comping, so keep that in mind.
More takes just give you more options and some backup when a take is perfect except for one word or note in your recording.
10. Get a DI Take Where You Can
You can easily set up certain guitars or bass to record a direct-in and mic take at the same time. It's usually a good idea to do so when you can. The reason for this is because you can often get a nice blend between the clean direct-in and the microphone recording when you mix.
11. Vibe Before All!
Good music recording is about capturing a performance that evokes a certain feeling. The performer, be it you or another artist, has to be able to get into a certain zone to let loose and deliver the magical take you need.
So, pay attention to your vibe in the room where you're tracking.
It might mean a few candles or dimmed lights. It may mean a stick of incense. Do what you need to get the vibe right and make it easier to get in the mood for magic. ;-)
"How Do You Record Good Vocals?" - Discover The 5 Factors You Can Adjust for Better Vocal Tracks

Good vocal recordings, like most things, depend on a combination of factors that have to come together in unison to produce the result you want.
So, to answer the question "How do you record good vocals?"...
You need to pay attention to and can adjust, if needed, the following 5 things to record good vocals:
- The room the vocal is recorded in - The choice of room and the acoustics of the room.
- The signal chain - Any piece of gear can be switched out. Includes mic, pre-amp, effects and processors.
- Your gain staging - Try to get levels optimum at every stage of the path.
- Your processing and effects - Compression and EQ settings.
- The vocalist - Position and performance.
The most crucial thing to pay attention to is everything you're getting apart from the vocal when you record.
Listen for the room sound or any noise present. It may not be present when you're tracking but the moment you add compression when mixing it will become quite obvious. So, you can even use a bit of compression when you track if you want to know what's present along with your vocal when you record.
1. The Room
In most cases, when you're recording vocals in a home studio, you want to get the vocal pretty dry. Aim for about 90-99% of the signal to be vocal and 1-10% being the room sound. Ish.
You don't really want too much of the room sound in the signal when the room doesn't sound too good. At the same time you don't want the vocal completely dry. Err on the side of too dry though. You can always add room and other effects back in after the fact. Getting rid of a bad room sound is more work. Ain't nobody got time for that!
Professional studios will often have a custom-built vocal booth but this isn't an affordable option for many producers like me and you who do home studio recording.
So, we have to make do with what we have available to get the best possible results we can.
Here are a few DIY isolation/absorption methods to consider when tracking vocals:
A. The Closet - Probably not a good idea unless maybe you have a very large walk-in closet.
B. Mattresses - Really dense mattresses around the vocalist can make a significant difference.
C. DIY Vocal Booth - A basic frame draped with acoustic blankets can dampen some reflections.
Check out this video by Dylan on the Musician on a Mission YouTube channel for a solid guide:
2. The Signal Chain
Gear, especially the analog variety, tends to impart a flavor to your sound. So, your choice of microphone, pre-amp or any other magic boxes you decide to add to your recording path makes a difference to your end results with home studio recording.
The main thing to remember here is that different mics and pre-amps will change your sound. This means, as you can imagine, that a bit of testing to find the right choices and the best combo for your particular vocalist will be worth your while.
In time you'll start to know which gear and which combos are likely to work in certain scenarios and this process will get a bit faster. At first though the best thing you can do is experiment and test.
3. Gain Staging
Gain staging is all about getting optimum levels at each stage of your signal chain going into your DAW.
If you're running your microphone straight into your audio interface you simply need to make sure your signal's average level hits the interface at around -20DBFS to -18DBFS.
The moment you add more pieces of gear like external pre-amps, compressors or EQs into your signal chain you'll need to spend a bit more time on gain staging to make sure the signal level is optimum at each stage.
This excellent and straightforward tutorial video over on the TrueSoundStudios YouTube channel does a good job of explaining basic gain staging with the type of vocal recording chain you might often use :
4. Processing and Effects
As mentioned earlier, you'll often hear the advice to record completely dry and add processing and effects when you mix. While this is a decent play-it-safe strategy for beginners, it'll definitely mean more work during the mix stage.
Once you know a bit about how to get the results you want from a filter or compressor it's worth it to add a tad of each when you track your vocals.
A subtle compressor can tame some unruly peaks and give your vocal a bit more of a solid body. A well-set filter can roll off lower frequencies like rumble that are worthless in the mix and will make your compressor trigger in non-musical ways. On that note...
It's important not to overdo it here. Too much low-cut and your vocal will lack body that's pretty impossible to get back in a mix. Too much compression will of course destroy your dynamics because it squashes the life out of your vocal. The attack and release times are quite important too. Listen for intelligibility (attack) and for a musical response on the compressor that fits with the song (release).
5. The Vocalist
Remember, your job is to capture the best possible vocal performance. So, you don't want your vocalist to adjust too much to the setup and environment but rather make the technical aspect invisible so they can do their thing.
That said, a bit of coaching may be needed at times.
Yes, singers with good mic technique are a blessing but not all too common. So, you may want to offer some basic advice in terms of where they should project to. Also, you want to remind them to maybe go slightly off-axis on louder notes.
Apart from this you only have to give them general guidance on the best position to keep.
On this point, you'll find a great technique to get a good mic/vocalist position in the last part of this post by the wonderful Bobby Owsinksi over at ProSoundWeb.
In Conclusion:
Home studio recording can produce impressive results when you know what you're doing.
Yes, a professional studio will always make life easier and have gear options not available in your home studio, but with a bit of planning, good setup and some of the tricks and tips you've learned in the above post you can get pro recordings using what you have access to.
I hope this post helps make your home studio recording process a breeze!
Need More Producer Skills in Your Stack?


Learn to understand equalisers and frequencies to supercharge your mixing skills and get results, fast...

New producer? Learn everything you need to produce your first professional track right now...

Would you like to discover the simplest and easiest way to learn music theory as a music producer?
Share this post. Spread the knowledge so other producers can benefit too:
- Renegade Producer
- Producer Skills
- Home Recording Skill
ⓘ Some pages contain affiliate links so I might earn a commission when you buy through my links. Thanks for your support! Learn more

